
Raised Stencil Tutorial
Hey!! Today im back with a quick post about a quick way to add a pretty little detail to your painted pieces. This is super easy and quick and adds just the right amount of character to a piece that might be on the plain side.
I saw a raised stencil a few years ago, then forgot all about them. But i was reminded of them again when i saw some pieces from Kristin from Tattered Perfection. So i chatted with her about how she went about it, she gave me a few tips and i got on my way to trying it out :)

When i 1st tried this, i picked up my stencils from Michaels. They are the Martha Stewart brand. They are ok – but they are really thin. I didnt realize how thin they were until i ordered some from Etsy – the place i ordered them from was a much more heavy duty, better quality stencil. But either will work fine.
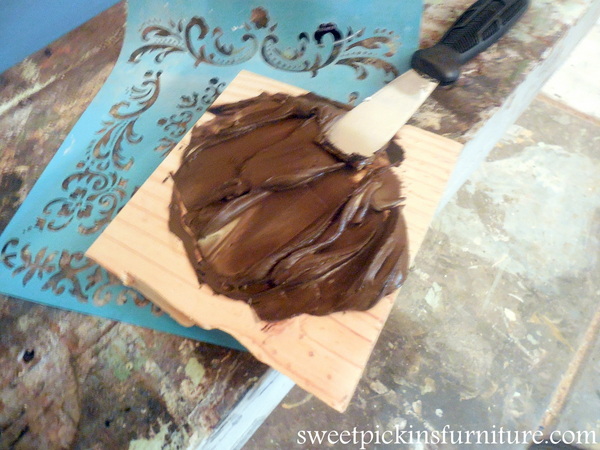
So all you need is your stencil, some spray adhesive (makes it a little easier), your vinyl spackling (this is the stuff to go with, its dries really hard and wont flake off when its dry and you touch it), a flexible putty knife and tint if you would like to darken your putty.
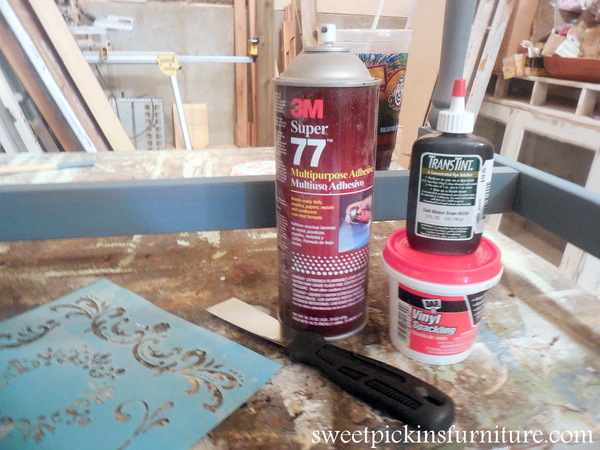
For this sofa table, i did tint my putty. I used a brand called TransTint n a dark brown color. I just picked this up @ Woodcraft. Its not necessary to tint your putty – it just gives it a little different look.
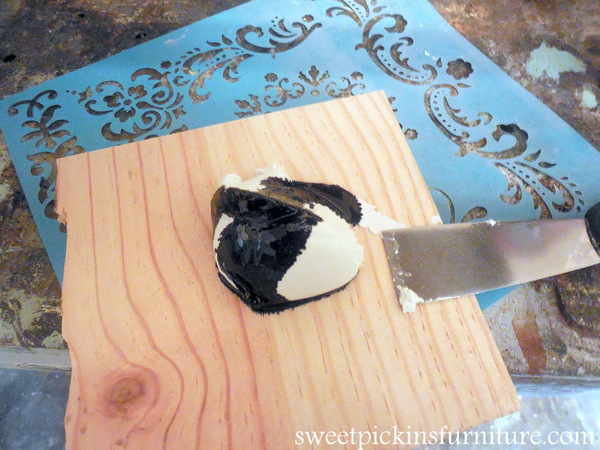
You just add the tint right to your putty and mix up – i added enough to get it a dark brown. Looks like chocolate frosting – yum :)
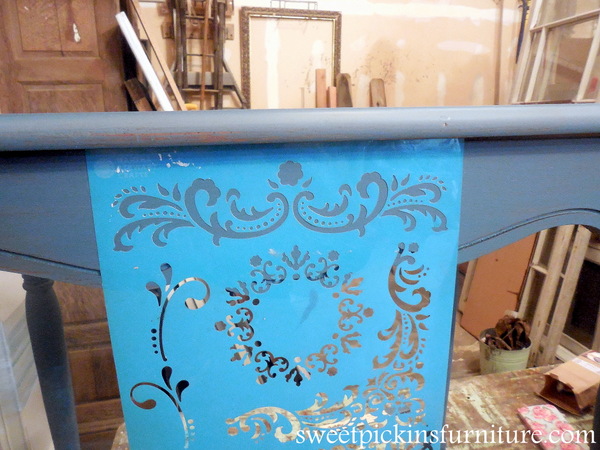
For the next step, ive done it both ways – and both work. You can either just hold up your stencil and apply the putty, or you can spray a little bit of adhesive to the back of the stencil (let it dry for a minute before applying to your furniture) so that it sticks in place. You just need to try it and find what works best for you. Some people also cut their stencils too – i havent done that yet but may have to if working in a tighter space.
Im not a measurer, i just eyeball it and stick it down to where i think it looks best.
Then you just take your putty knife and smear the putty over the stencil so that its all covered. I found its really important to use a flexible knife – its makes it much easier.
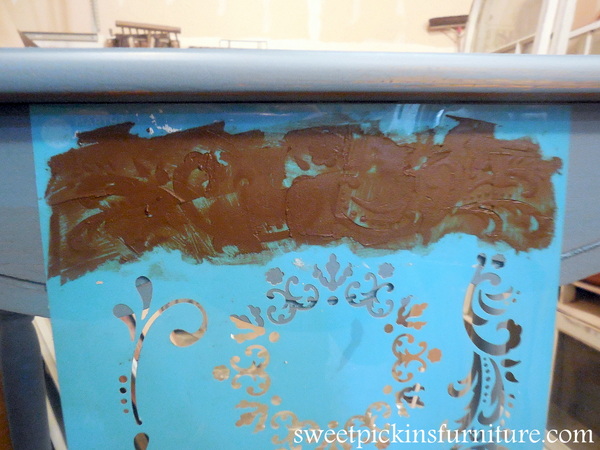
After ive got the design covered, i just take the putty knife and lightly go over the stencil to remove any highspots and excess putty. If you were going for a more textured look – you could for sure skip this step. You could also dab the putty with your fingers to give even more texture.
Even with wiping a good amount of the putty off – you will be surprised at how thick your stencil is, so dont worry about how thin the stencil is – it will work, i promise.
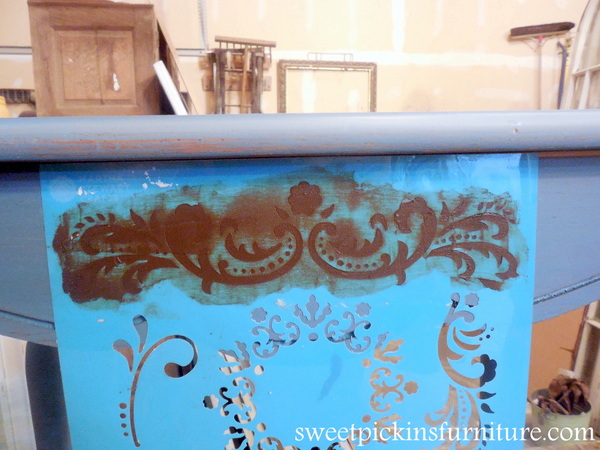
Then – you just pull the stencil off and you have a raised design!!
If the stencil isnt perfect, you can take your finger or a small brush and clean up the design or wipe off any extra putty as needed.
Normally i can use the stencil about 4 or 5 times and then i have to clean my stencil up with some water.
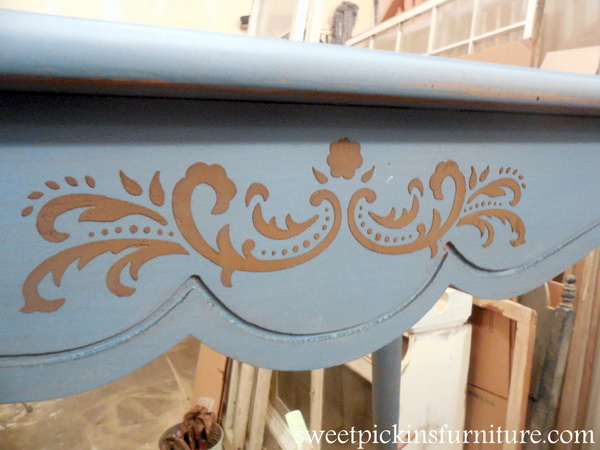
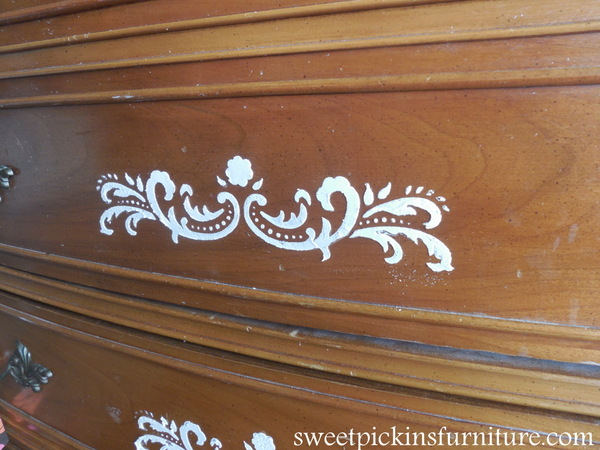
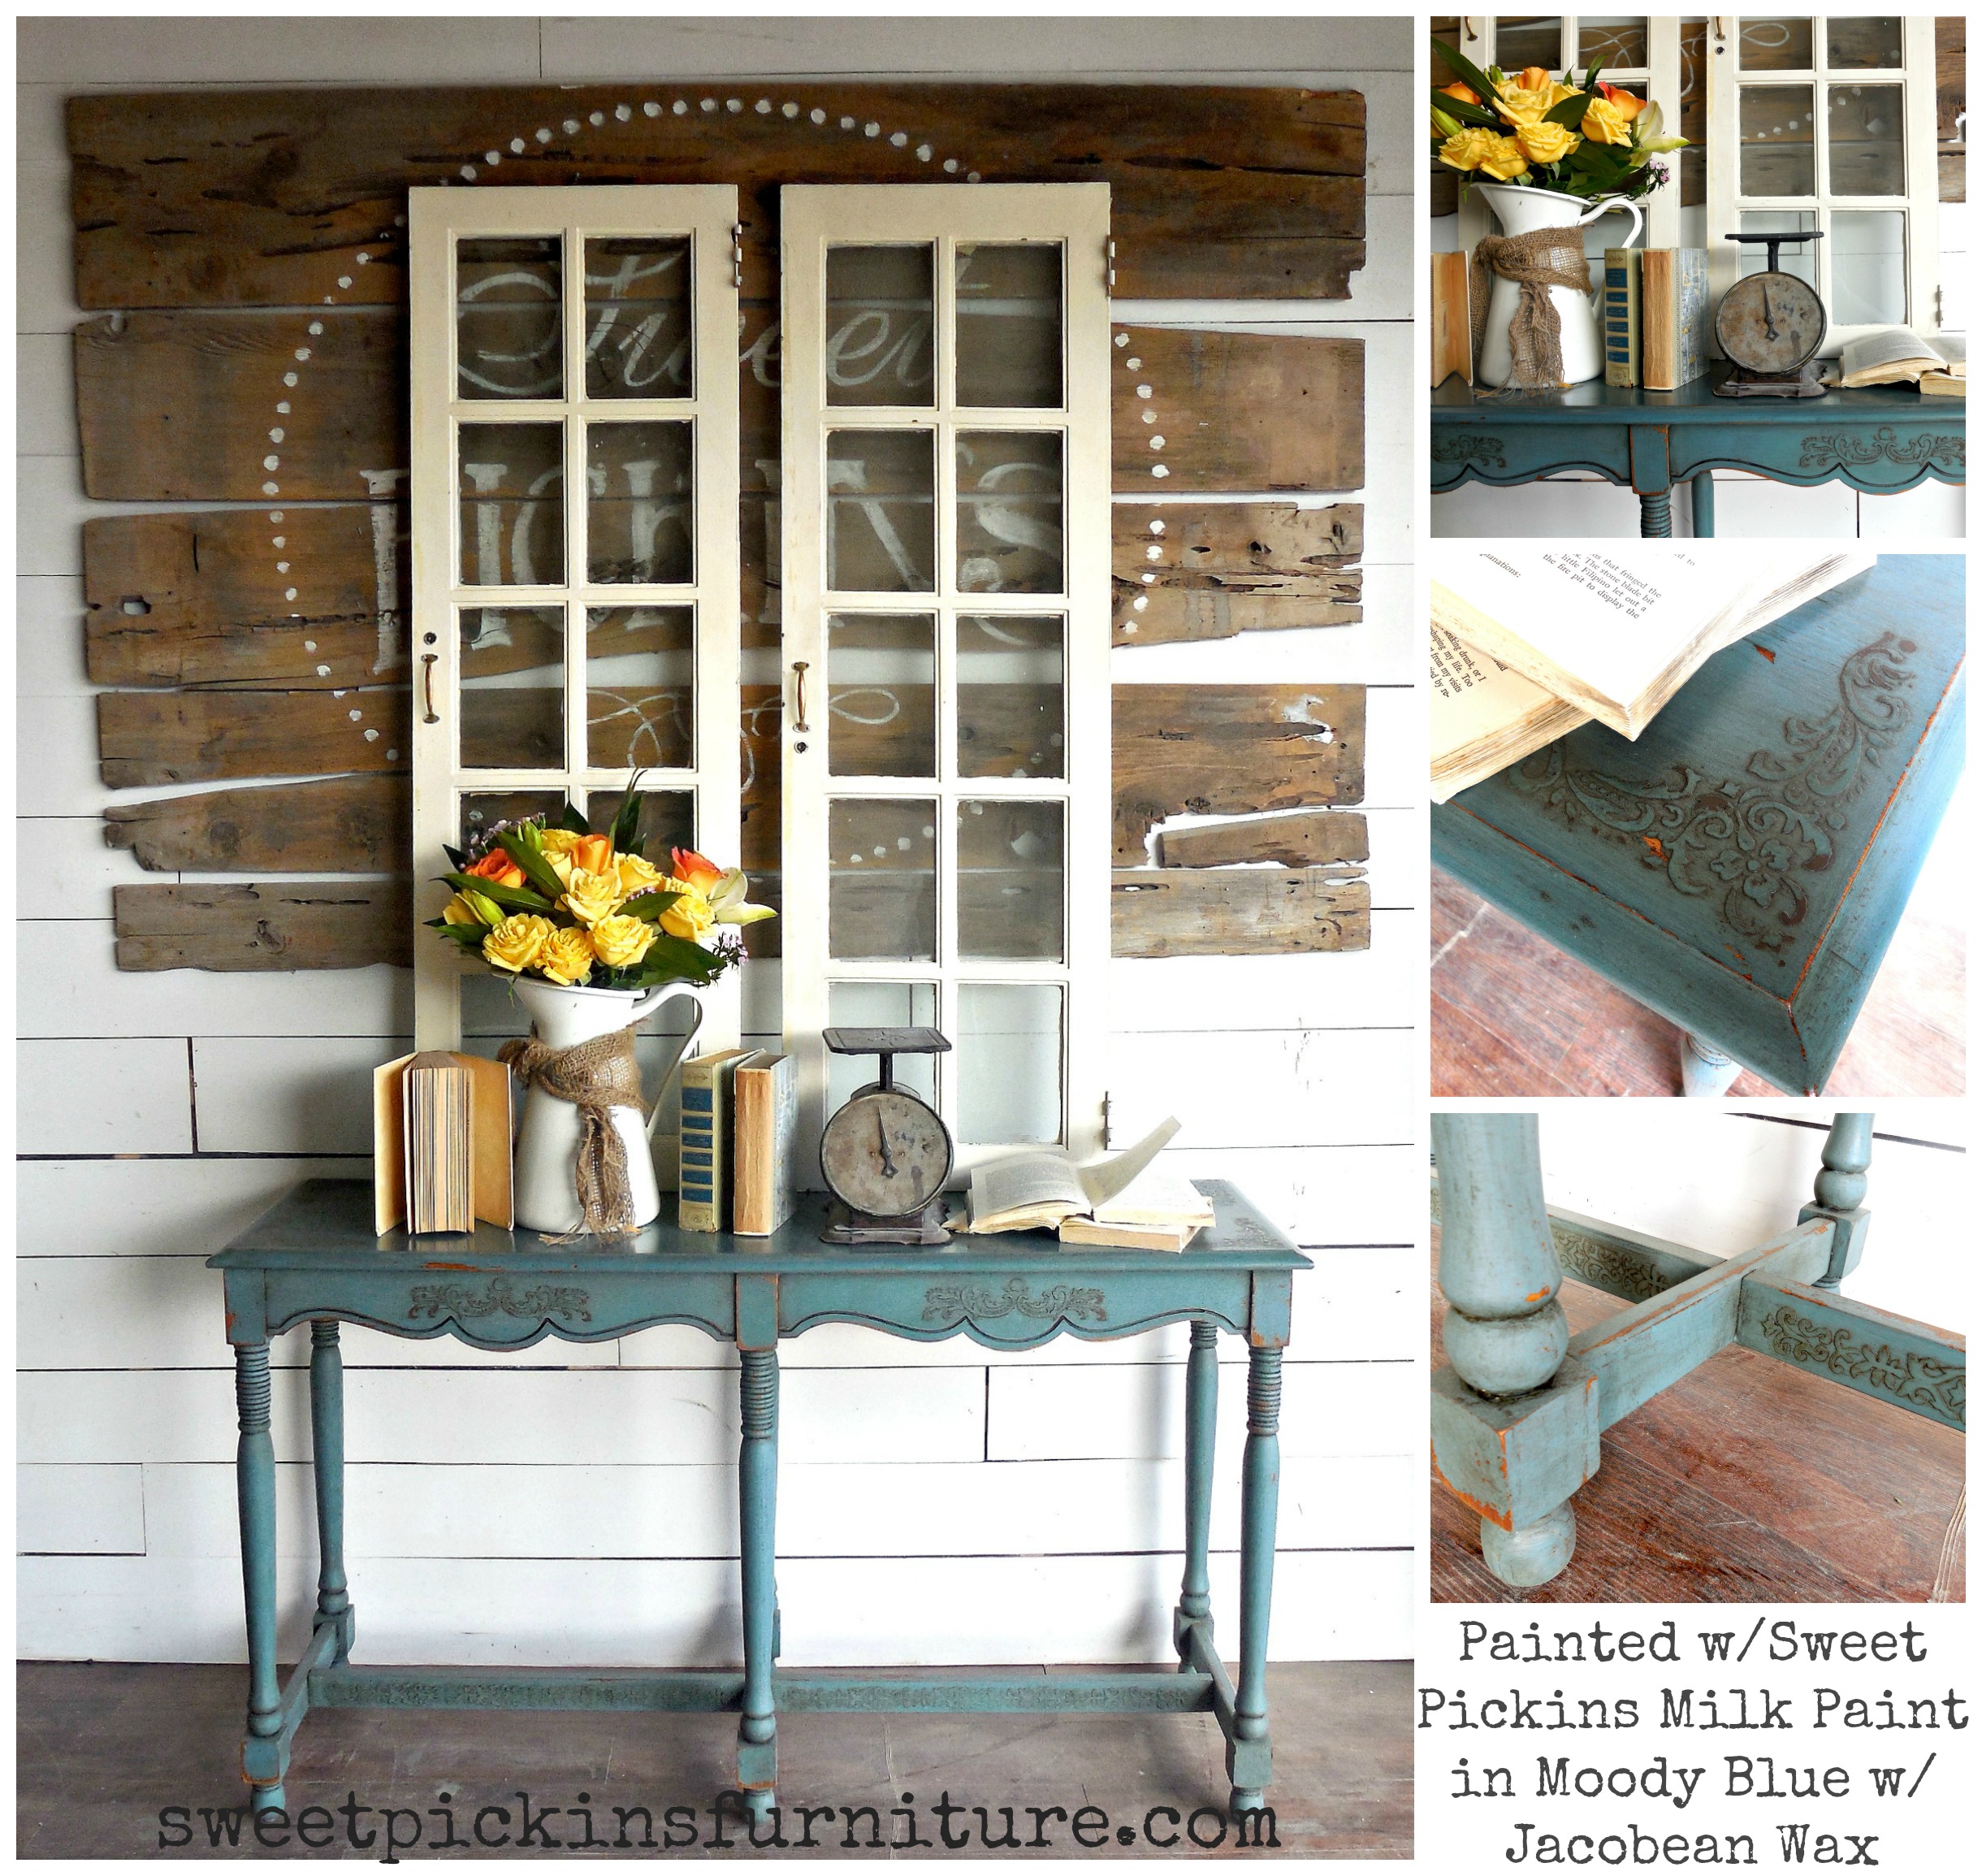
You can see in the 1st pic that i painted my piece 1st. I actually just did one coat of milk paint, then added the stencil and then did one more coat of milk paint over it. In the 2nd pic, i just used the putty in white and painted 2 coats of milk paint over that. Either way works – but i think its important if you need the stencil to be durable, that paint is applied over the stencil to seal in the plaster.
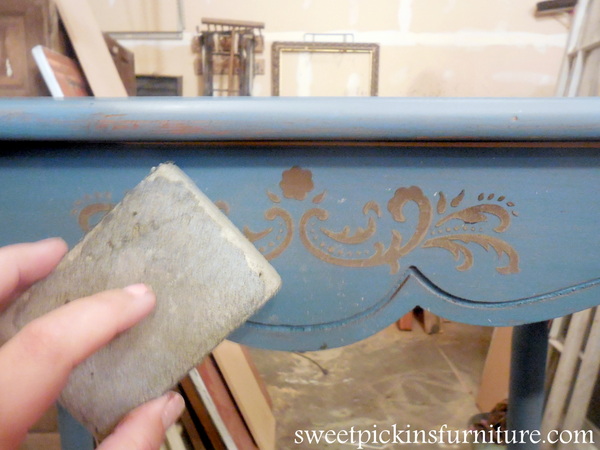
After the stencil is dry which takes about an hour or 2, i just take a fine sanding sponge and lightly sand it to remove any high spots.
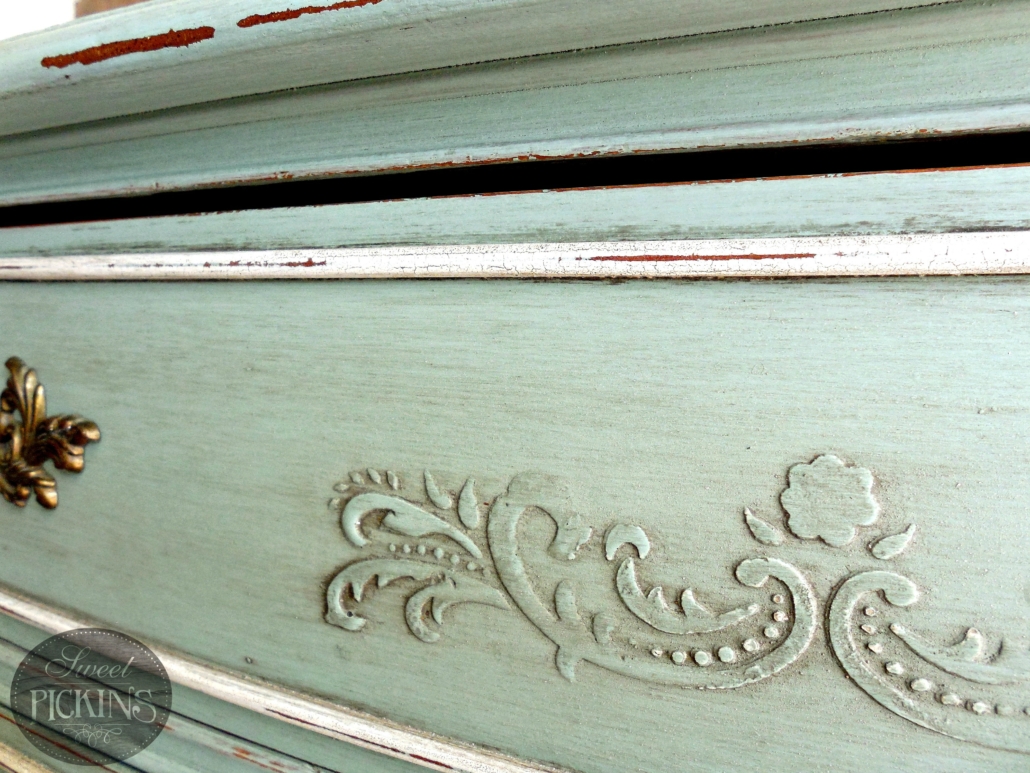
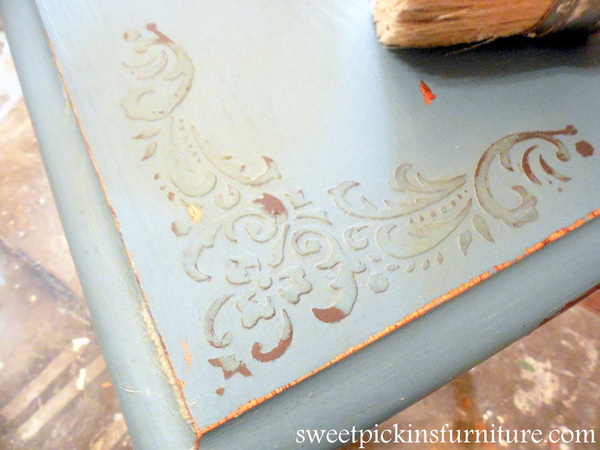
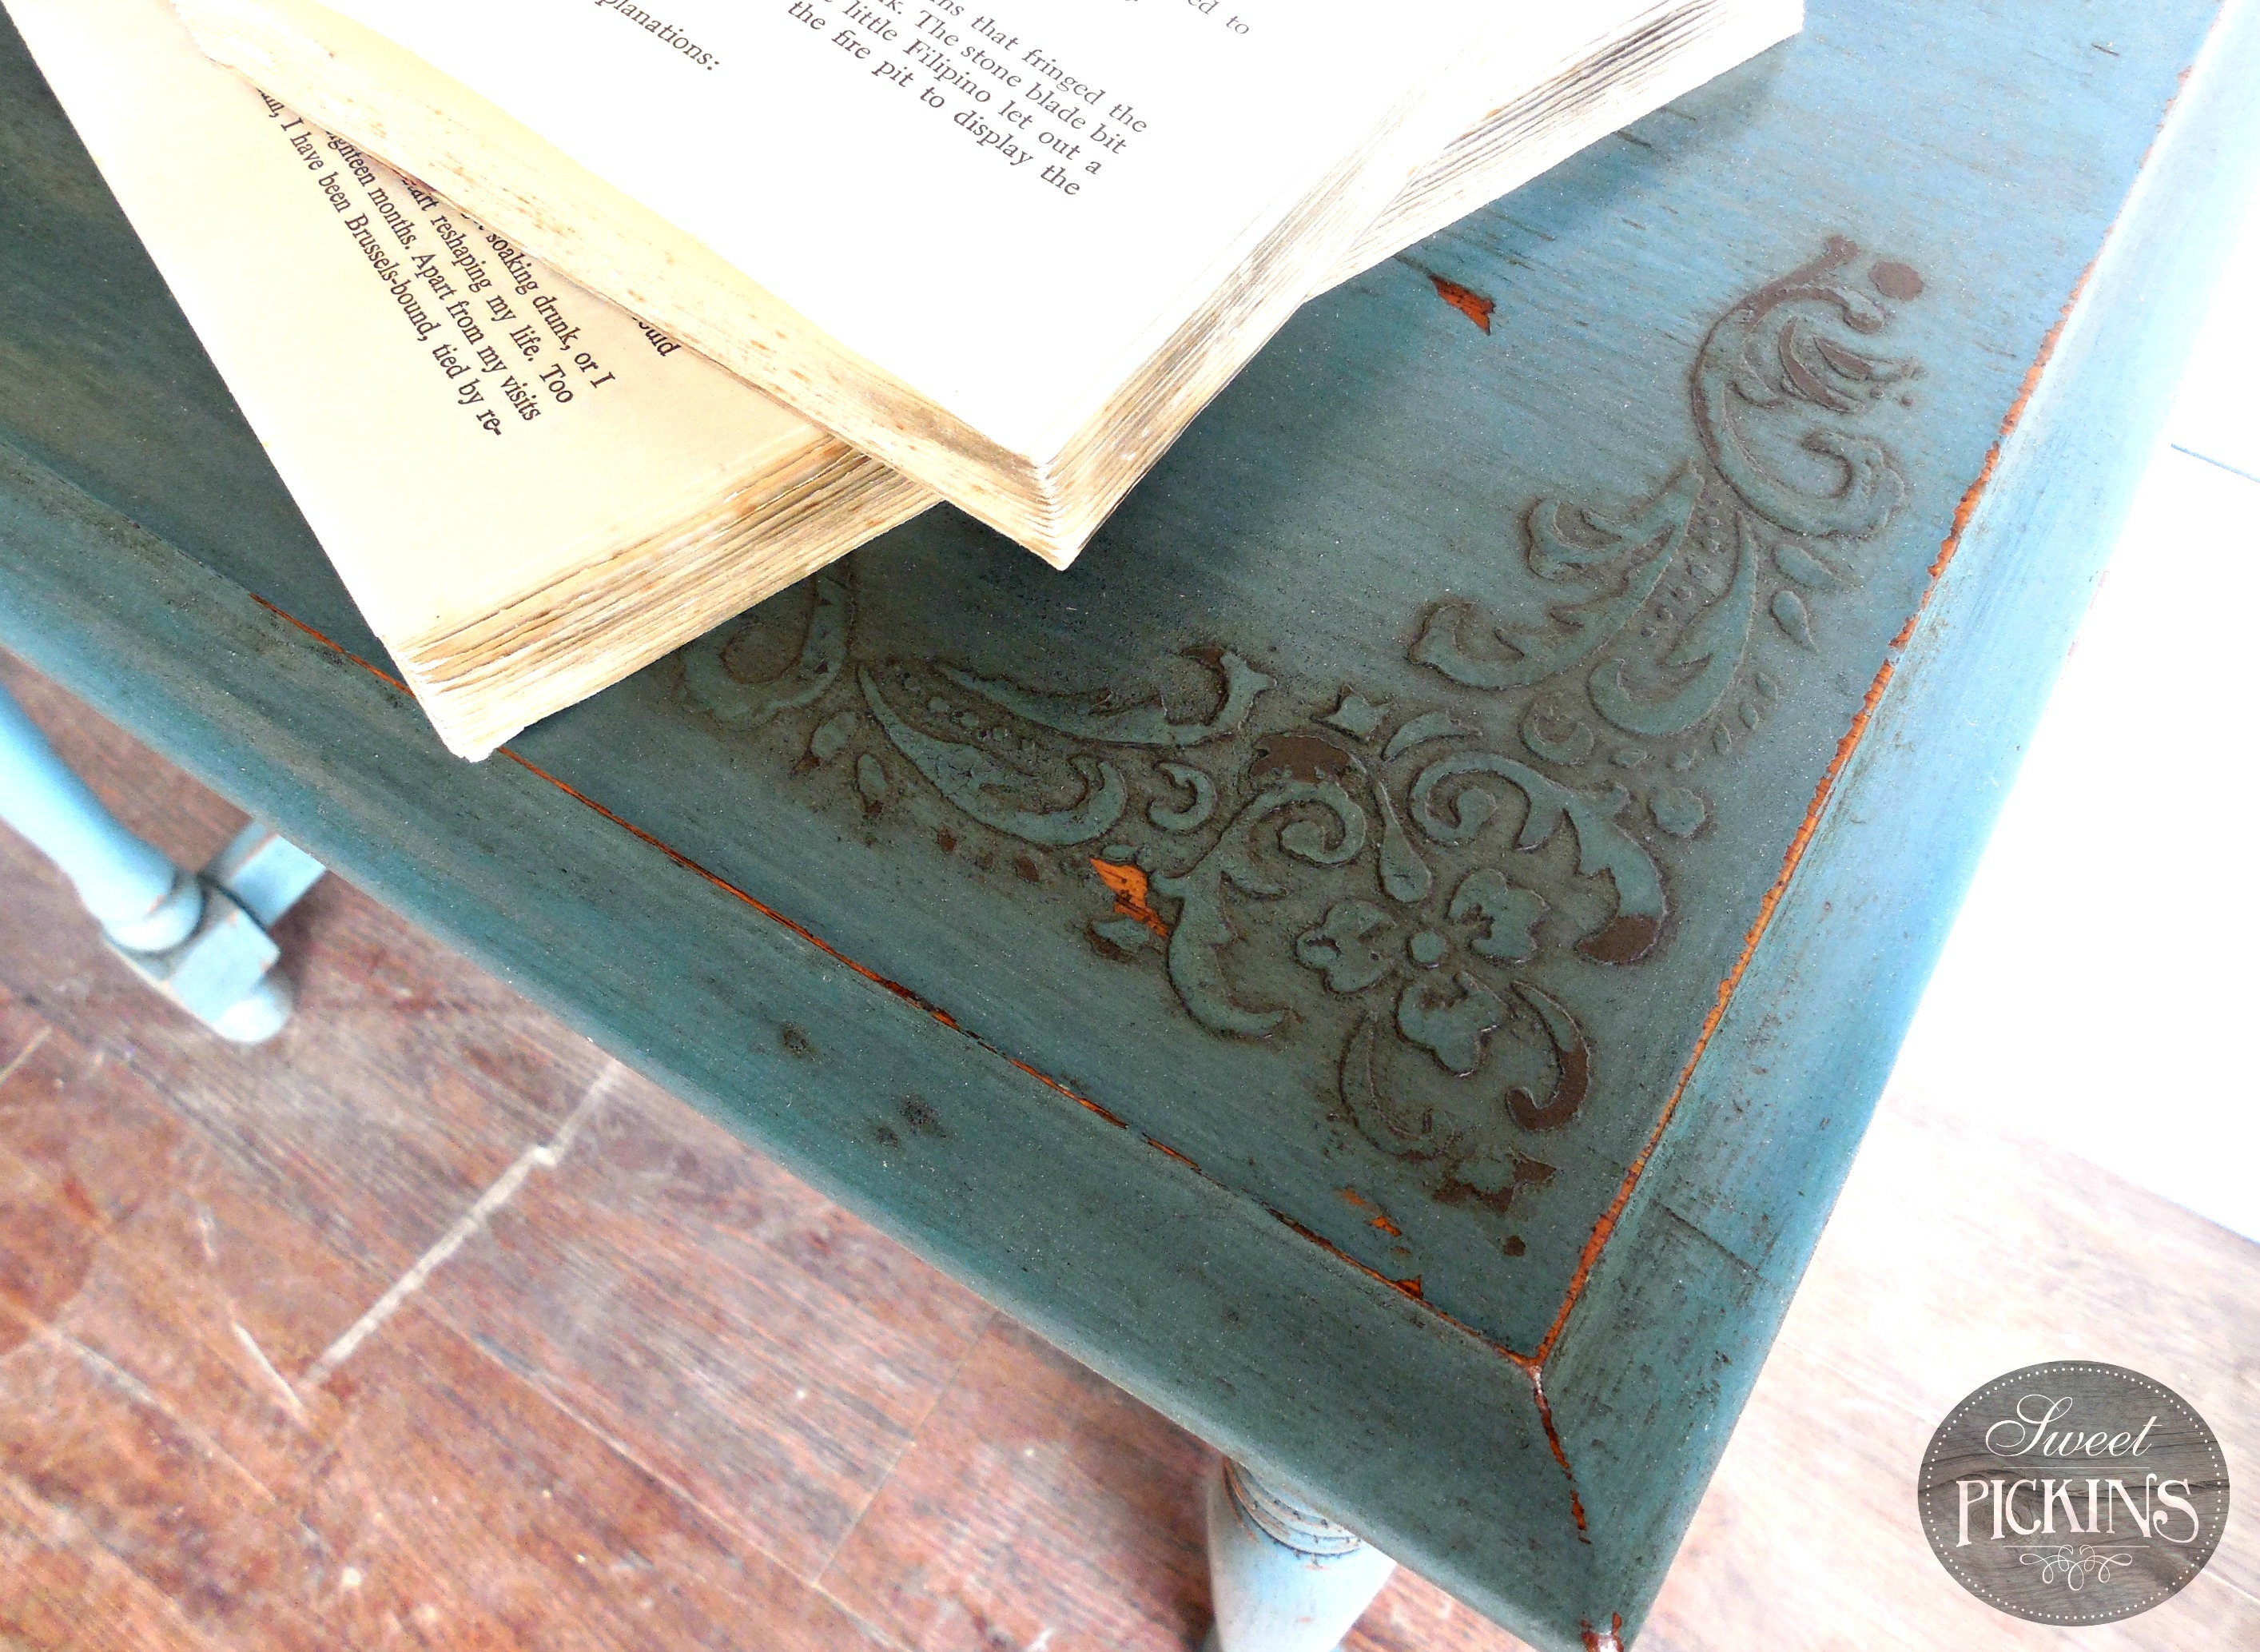
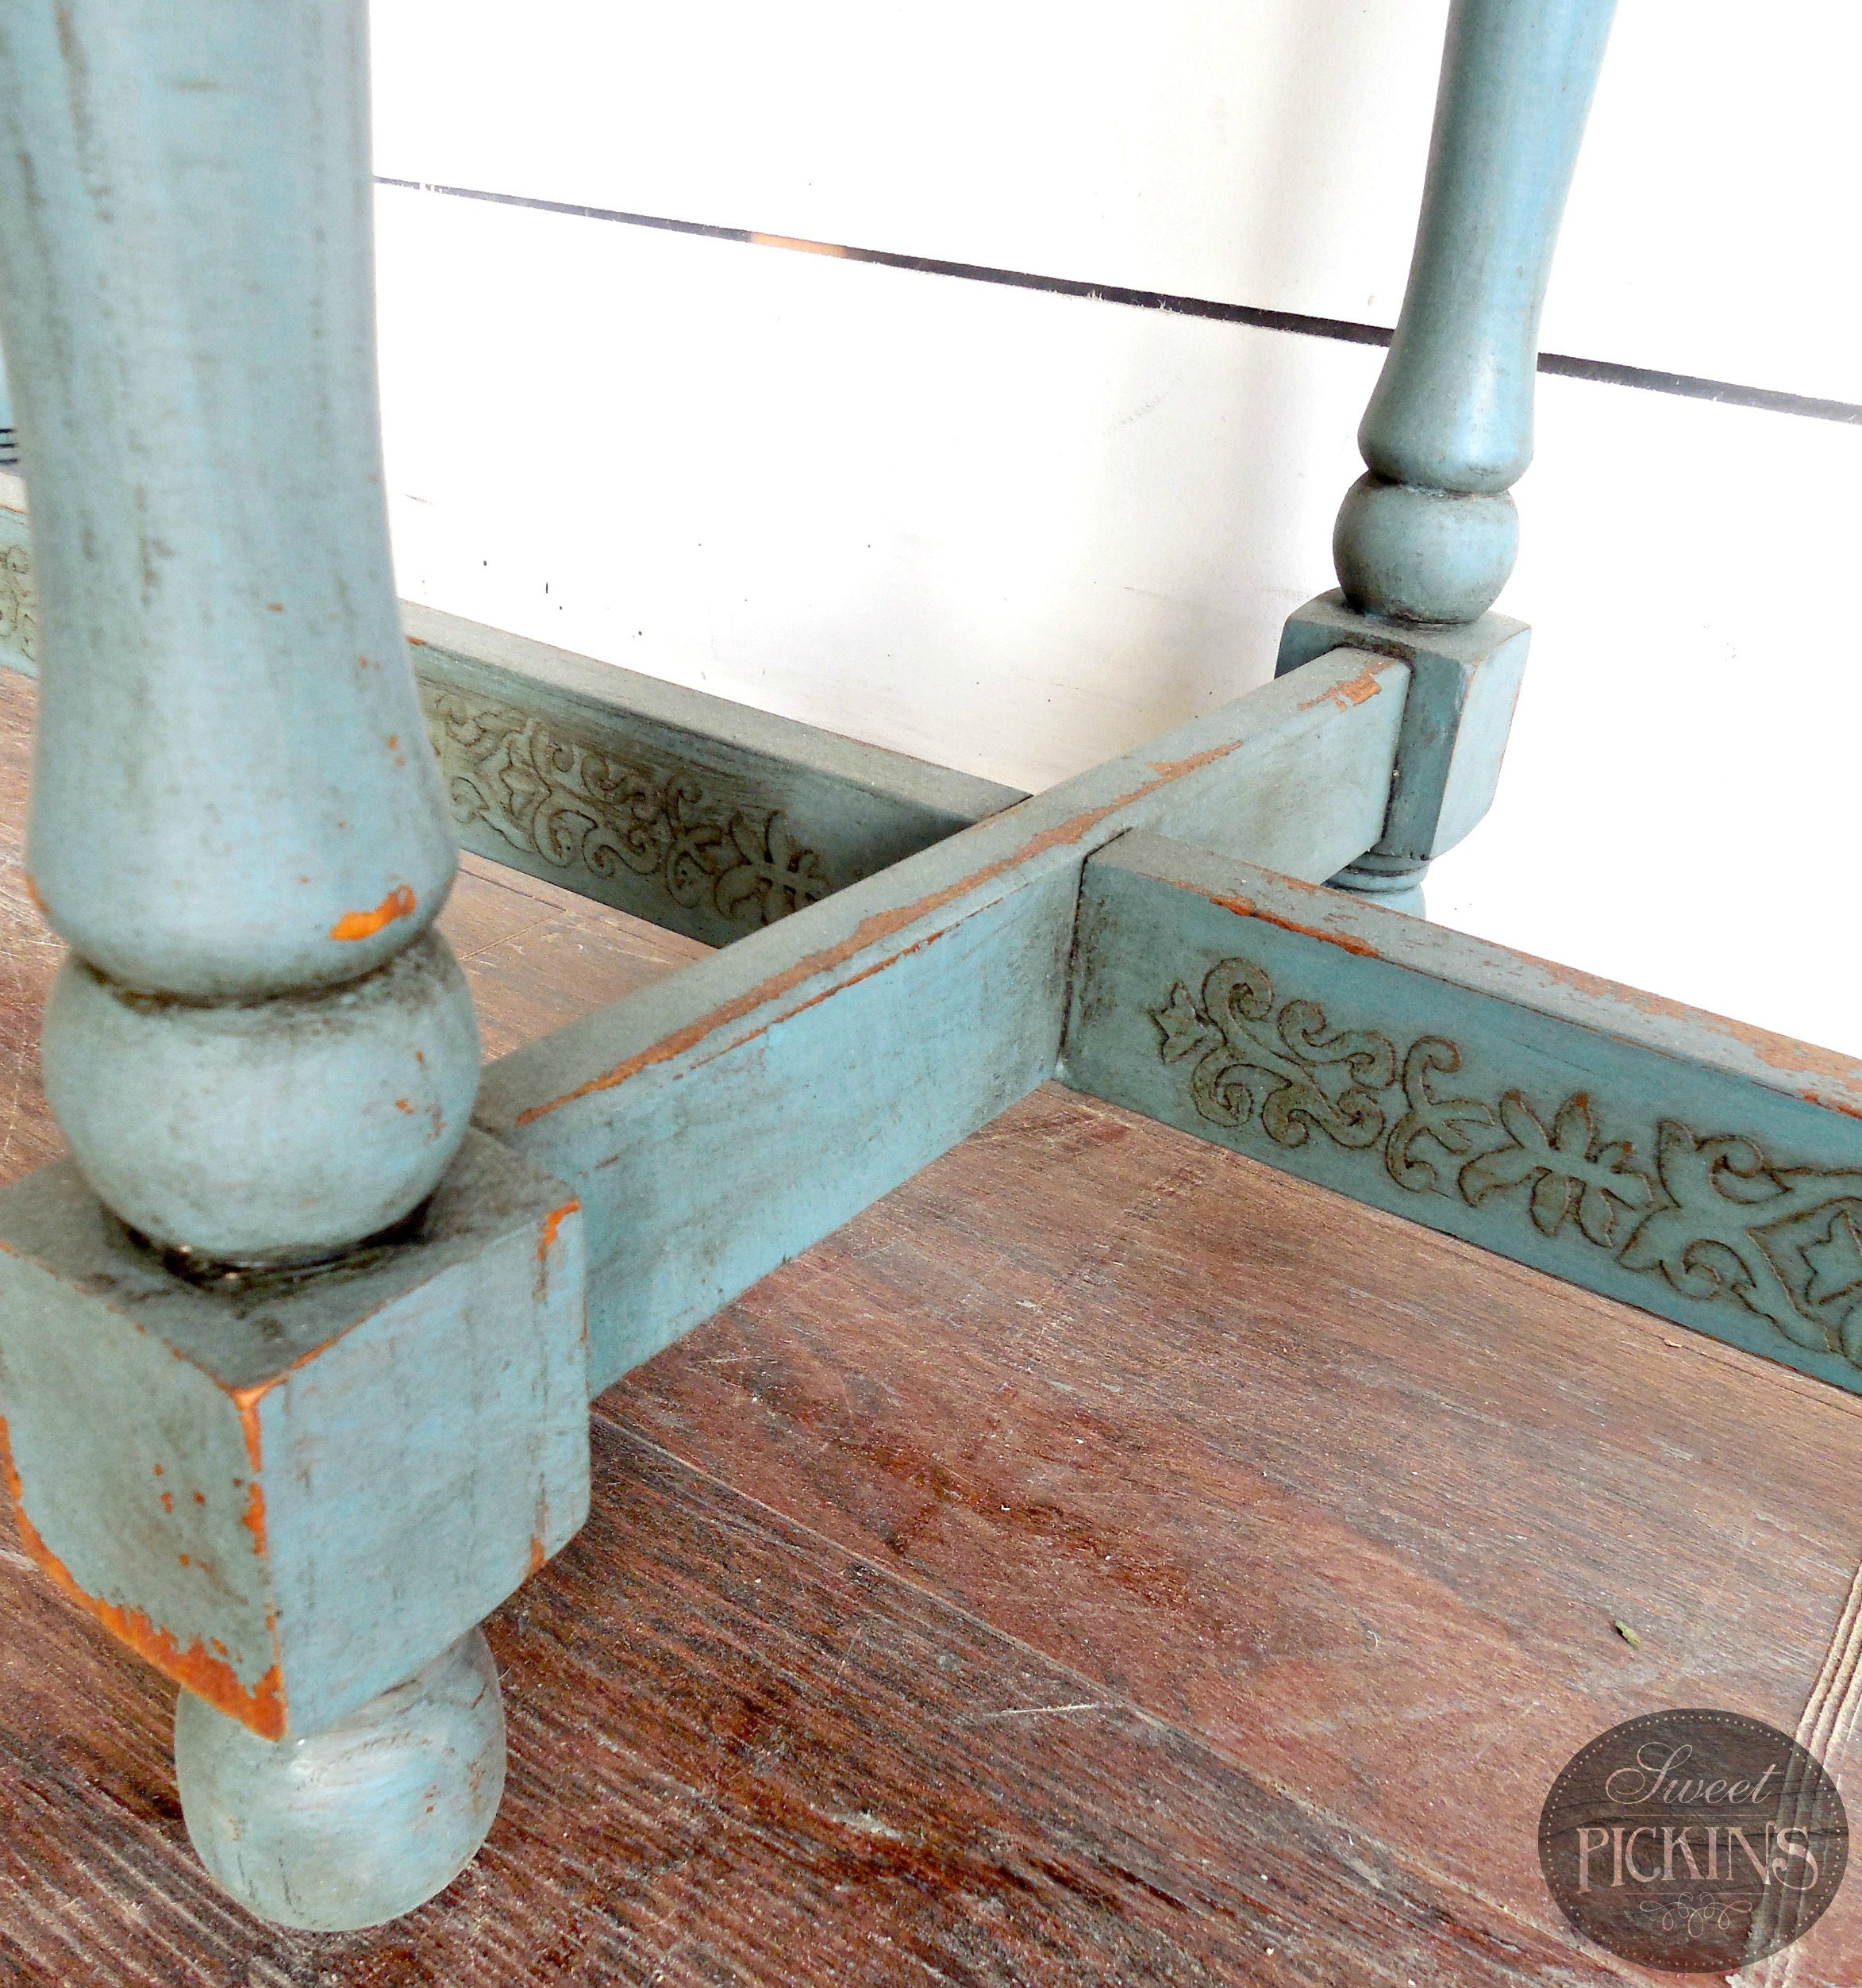
Then just paint as normal and either distress your piece to show the lines of the stencil, or even better is to add a little glaze or dark wax over the stencil so it highlights it! The pic below shows just the stencil distressed and clear waxed…
Heres the same spot with it dark waxed as well – so pretty!!!
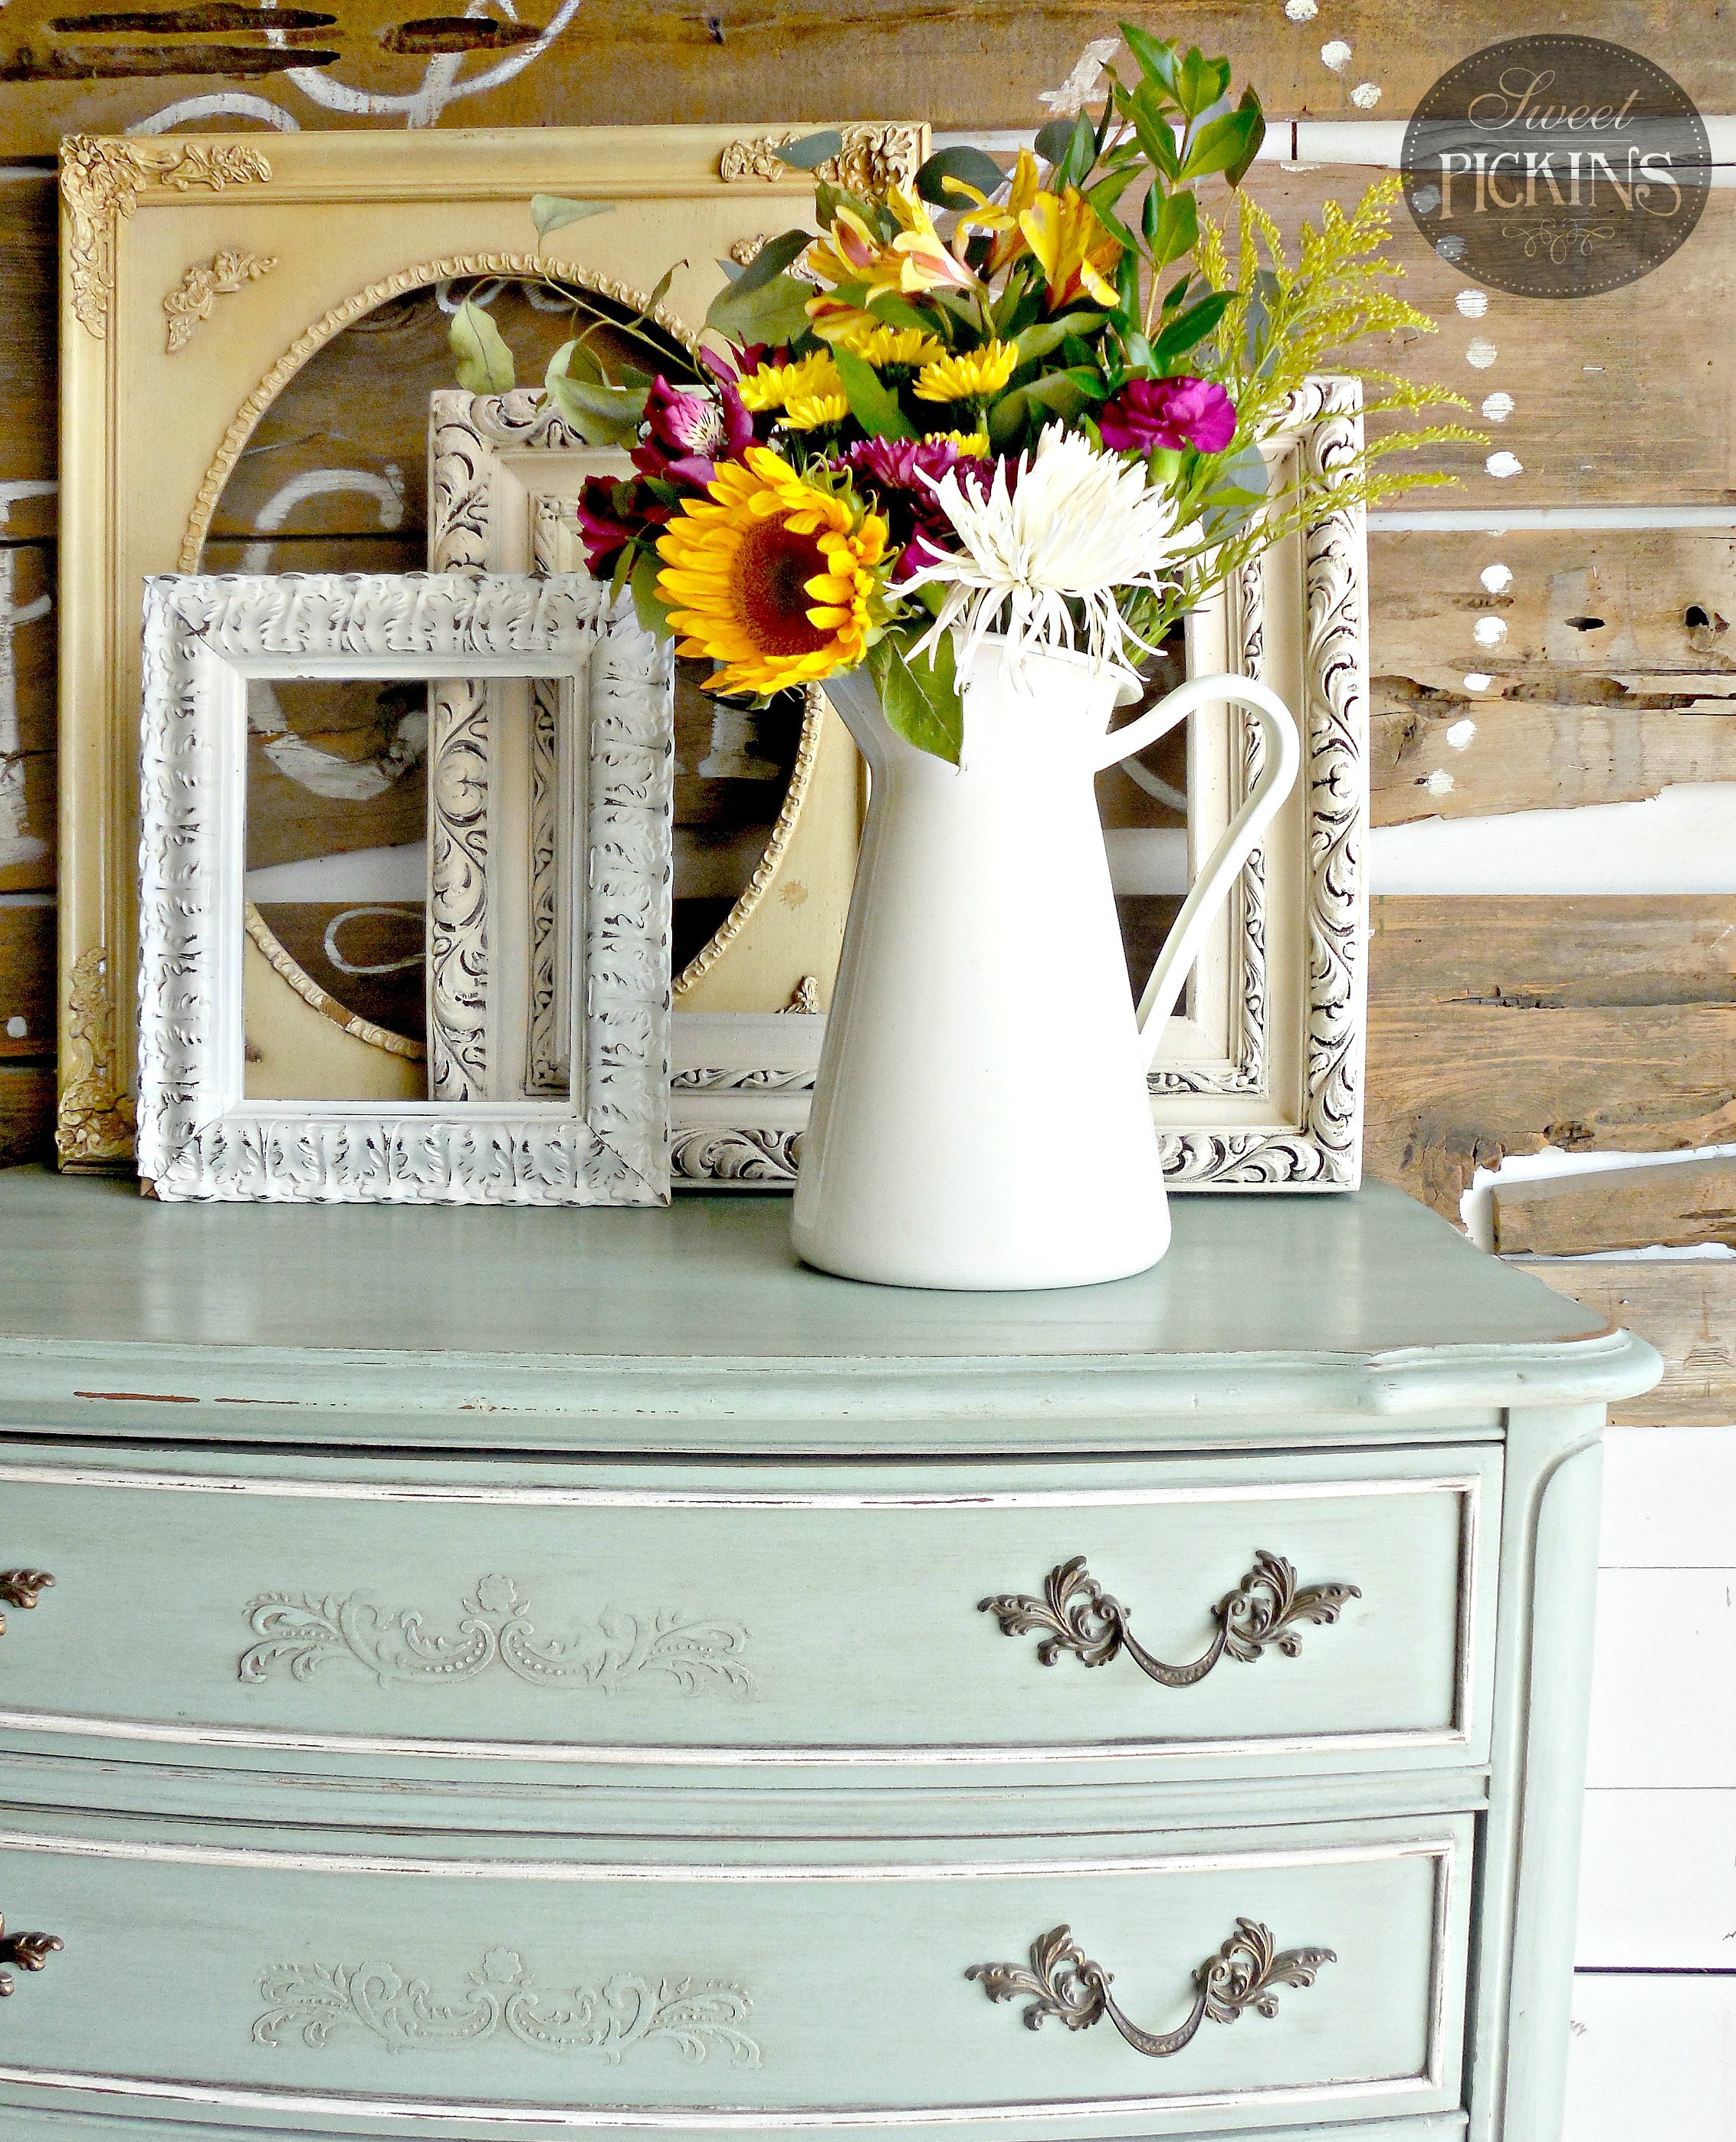
This piece i used the stencil in just white and then used our Aging Dust over the milk paint to highlight it.


And there ya have a quick and easy way to give your piece a little character and dimension!

